

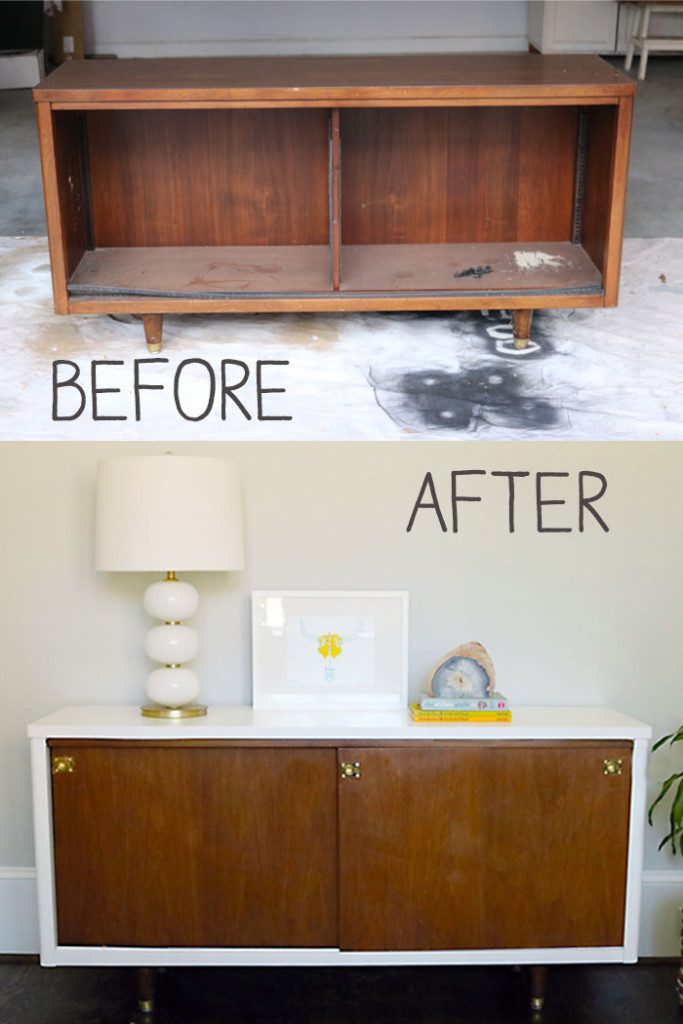
Before + After: Lacquer Mid-Century Modern Credenza Makeover
I came across this mid-century modern credenza at an estate sale. It was the last day of the sale, so I bargained and paid less than $30. What really caught my attention was the brass modern round, tapered legs. The wood grain was in pretty good condition, but I knew I wanted to lacquer the outside of the frame and add brass handles to freshen it up. I have used Amy Howard at Home Lacquer spray paint before on a lamp and really liked the results, so I thought it would work perfect for this project. The piece was in overall good condition– just had some minor scratches, dried paper stuck to it and a lot of dust. Estate sales are a great place to find mid-century modern furniture pieces. I’m slightly obsessed with Worlds Away furniture and they do a lot of two-tone credenza pieces, so I knew this mid-century modern credenza makeover was a perfect project to tackle and create a copycat look.

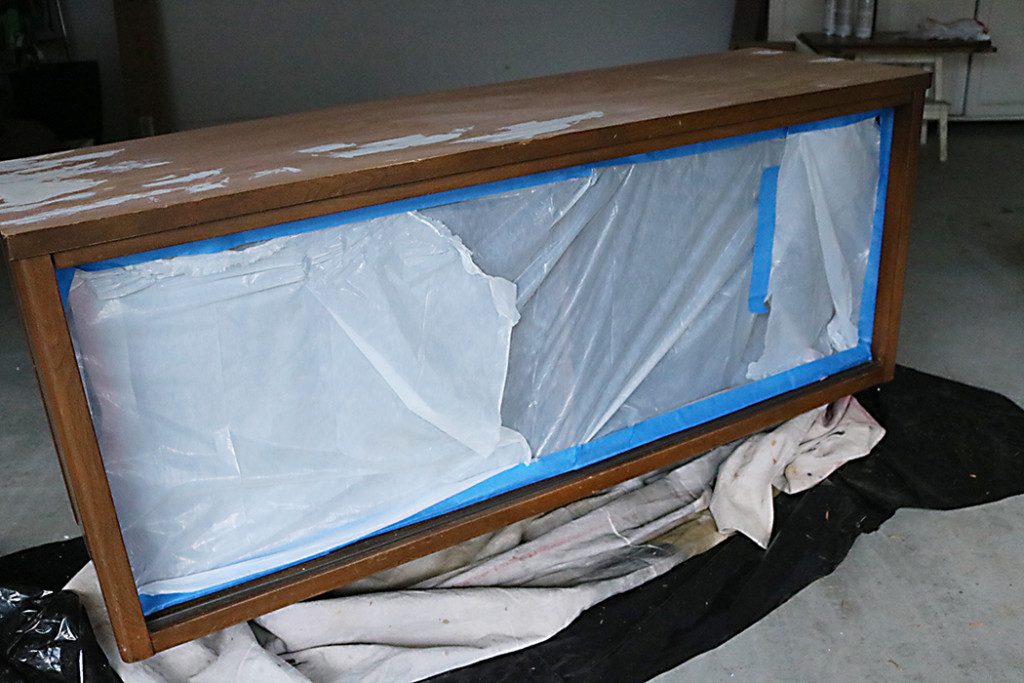
Before picture of the mid-century credenza at the estate sale. Isn’t my baby cute in her mismatch princess shoes?!
Once I got the piece home, I pulled the sliding doors off and took the shelves out. I wanted to do a two-tone, mid-century look with a white perimeter but keep the wood-grain sliding doors the same wood stain. So I really didn’t want to take the chance of getting paint on the doors.
- Using a de-greaser, like Simple Green, I cleaned the inside and outside of the furniture piece removing any dust, particles and grime.
- Then I taped off the sections that I didn’t want any paint to get on.
- The top was laminate, so I ripped that off and then used wood putty to fill any holes. Then sanded so the wood putty was flat. I probably didn’t have to do this since I was just spray painting the top, but I thought I would get a better result. In the end, it was a step I could of skipped and would of saved a lot of time. Make sure to remove ALL dust before going to the next step.
- After, I spray painted the piece with two coats of a white furniture primer. You must prime the piece with a white primer to get the best results.
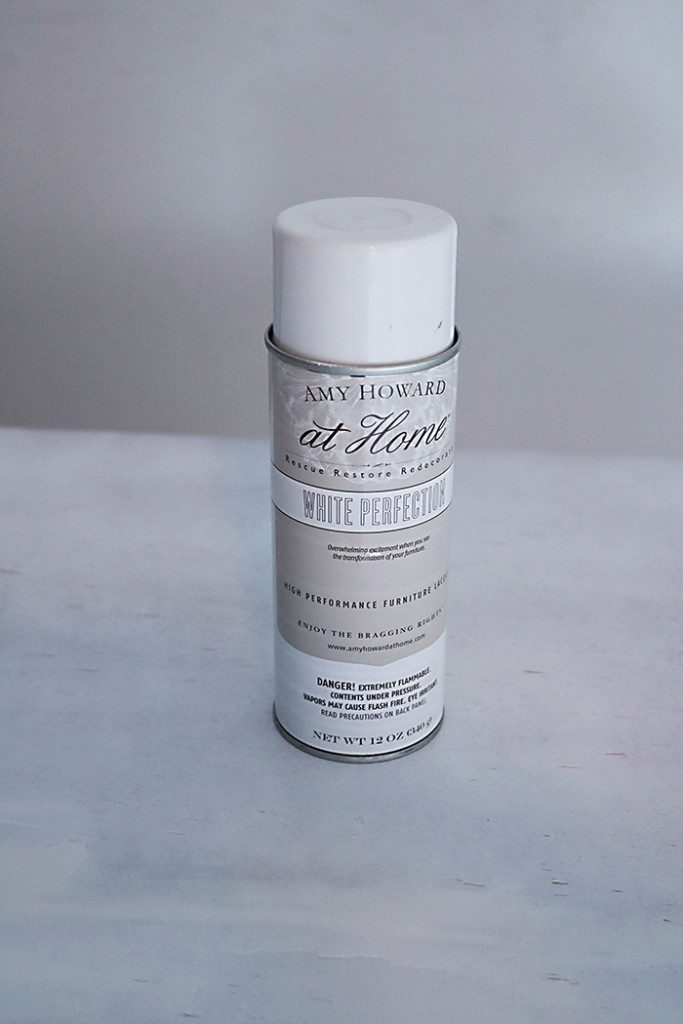
The lacquer products you will need are Amy Howard at Home White Perfection and Bright Idea lacquer spray paint. I used about two cans of the White Perfection and one of the Bright Idea. Amy’s high performance furniture lacquer is my favorite and is actual lacquer that creates a thick, rich, high-gloss finish on a piece of furniture.
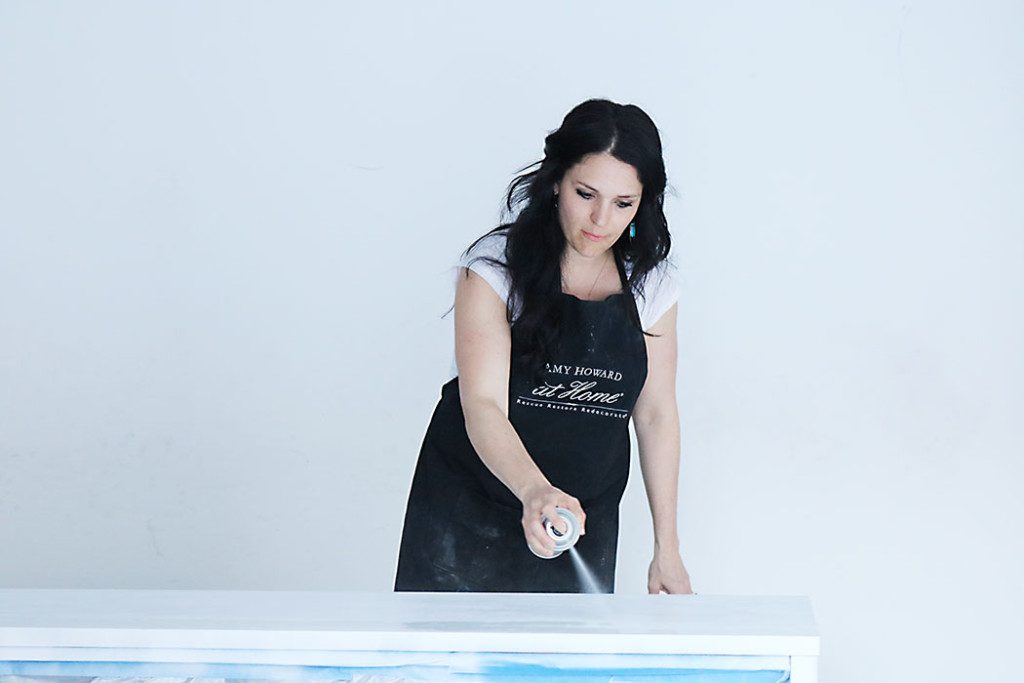
5. Take the White Perfection lacquer spray paint and using horizontal swiping motions at an 8-10” distance, spray in short spurts at a time overlapping each stroke. Don’t linger too long or spray too closely. This could create drips! I spray painted back and forth, back and forth to create an even finish.
6. After it dries, lightly sand (with 400 grit sandpaper) any puddles or uneven lacquer areas on the piece. Wipe well with a tack cloth to remove any dust.
7. Apply a second coat of white perfection lacquer spray paint. Let it dry about 30 minutes. Then sand again.
8. Repeat until you get the desire finish. Once you get the desired look, you don’t have to sand. It took me about three coats of lacquer until I was satisfied.
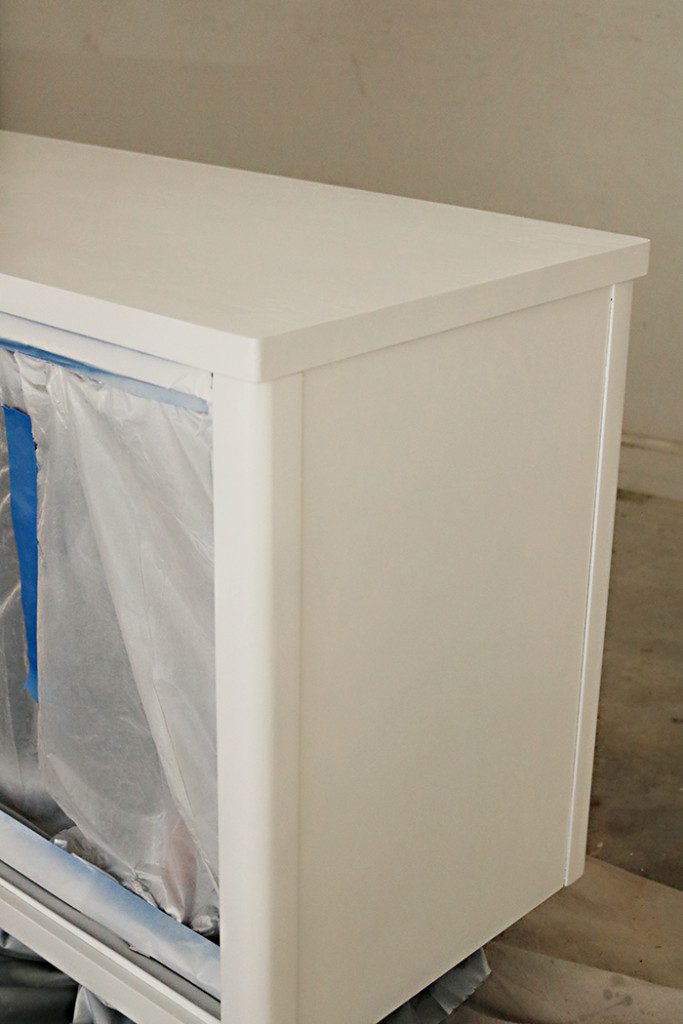
9. To finish the project, apply Amy Howard at Home Bright Idea Clear Lacquer Spray Paint. This will give it an added protection to the lacquer and a high-gloss finish. Before I applied two coats of the Bright Idea clear spray paint, I made sure the piece was completely dried. Using the same horizontal motion, completely cover the piece of furniture. If you get any puddles, no worries! Just sand down with 400-grit paper after it dries and in between coats.

10. Before you enjoy your furniture piece or move it, make sure to let it cure about 3 days for added protection!

While the piece was curing, I cleaned the brass legs with Brasso. The brass was pretty dull and this gave it a nice polish. Then I used Goof Off pro-strength to remove any marks on the wood grain of the sliding doors. You have to be careful because this stuff is strong and will strip stain if you rub too hard. Then I went over the piece with a wood stain marker to cover any scratches.

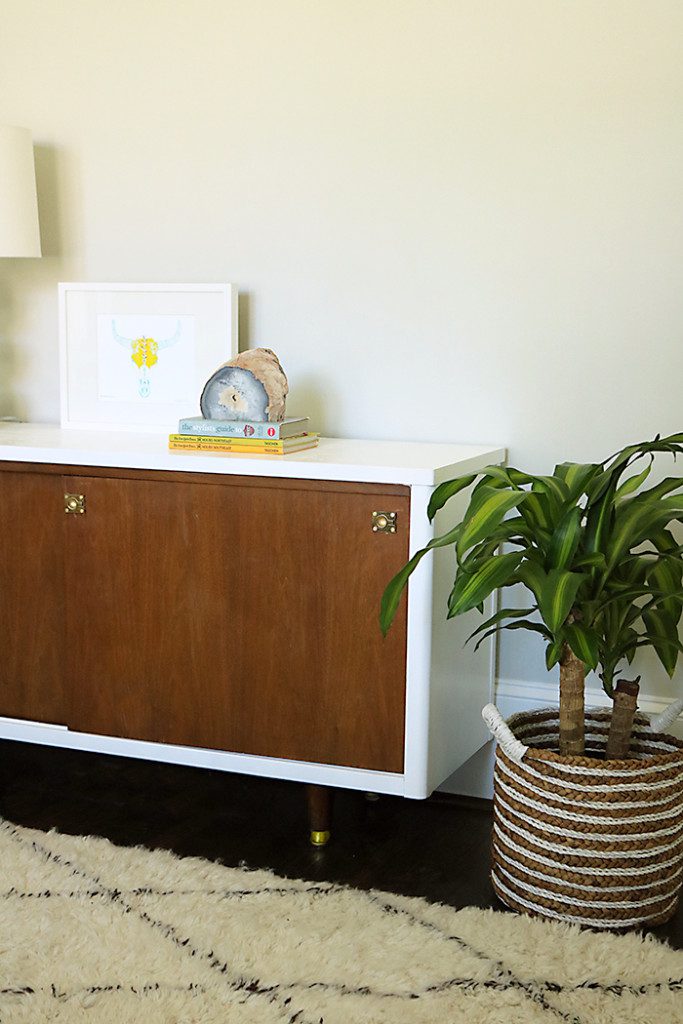
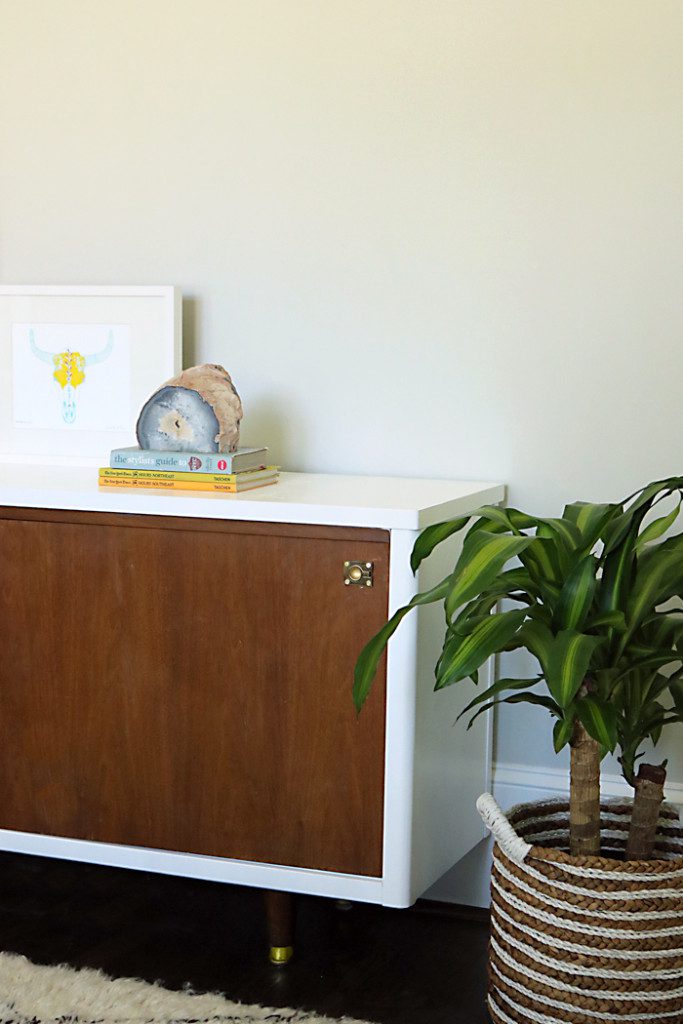
I switched out the little finger pulls on the sliding doors with these brass hardware pulls from House of Antique Hardware , which are great for sliding cabinet doors. My only complaint about them is we had to drill a hole in the doors to make the hardware flush to the sliding doors, since the rear of the hardware is not flat but has a circular bulge for the finger pull.
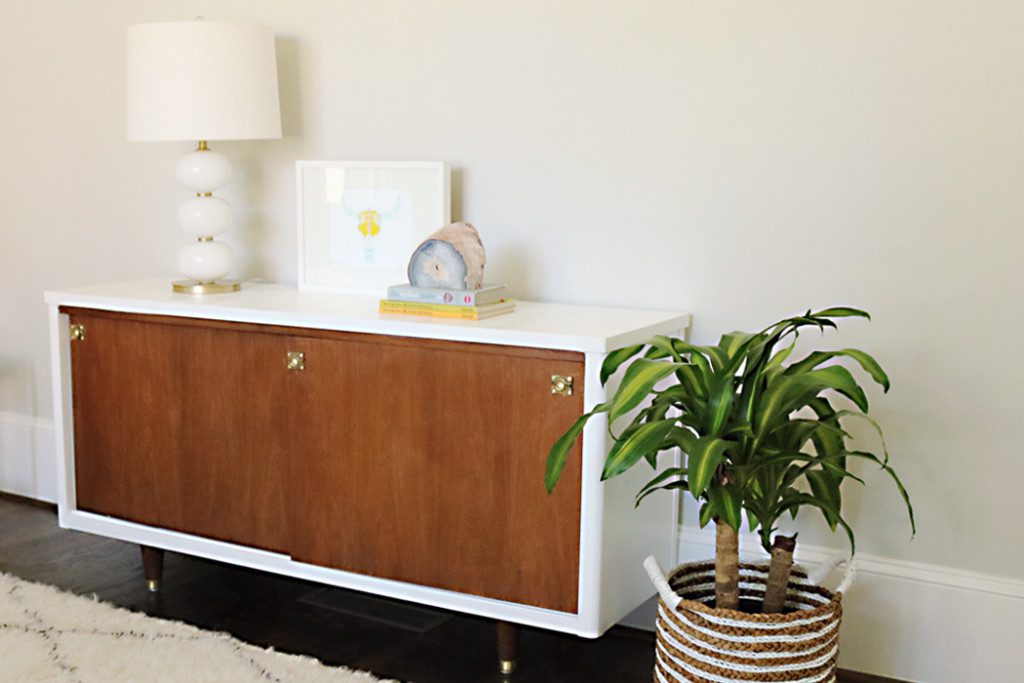
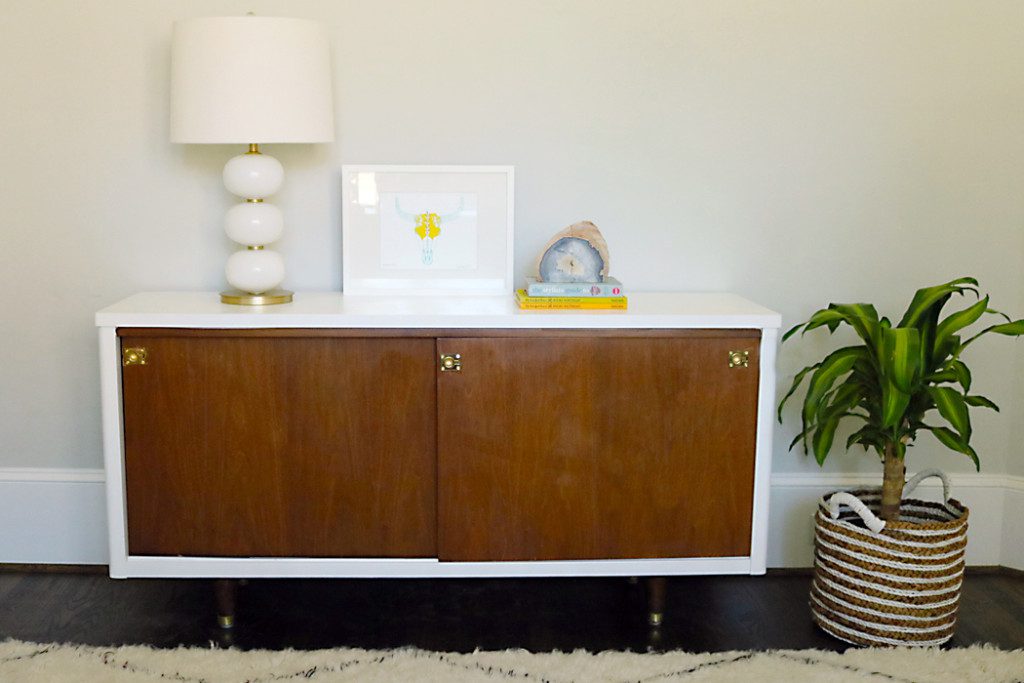
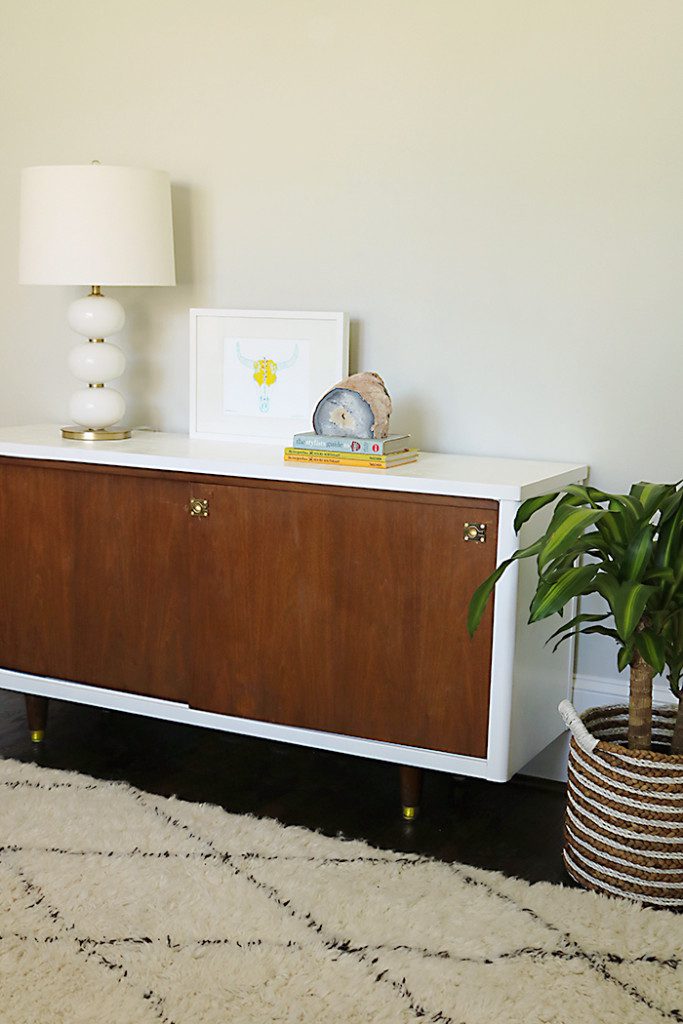
I would say this mid-century modern credenza makeover was a success, and I am excited to use it and show it off! I love the Amy Howard at Home lacquer paints. They really can drastically change a piece, and give it a high-gloss finish.
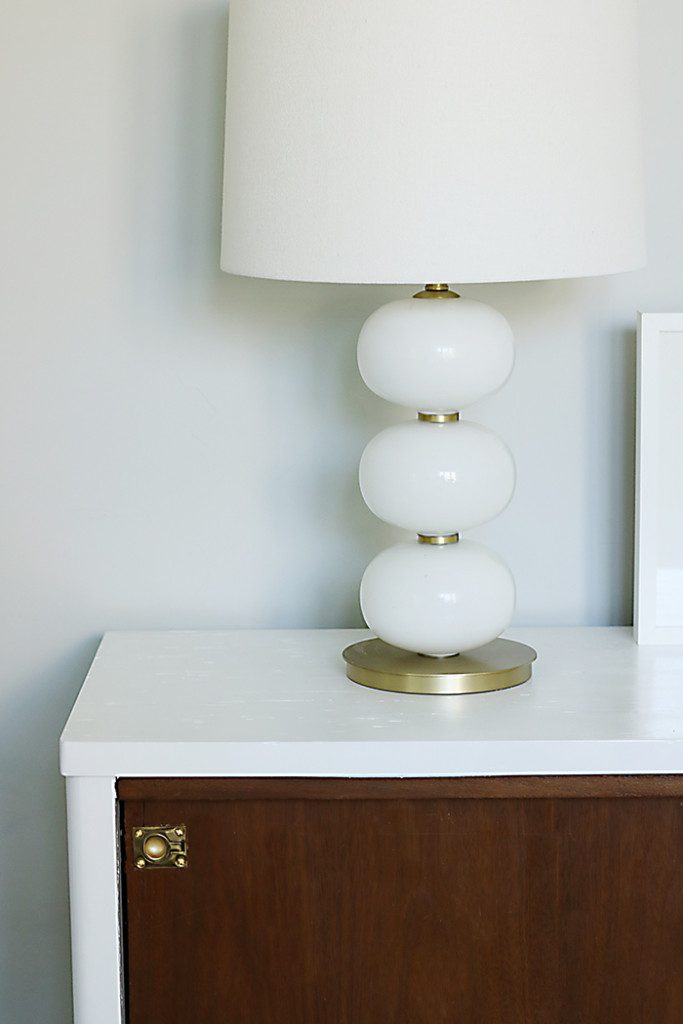
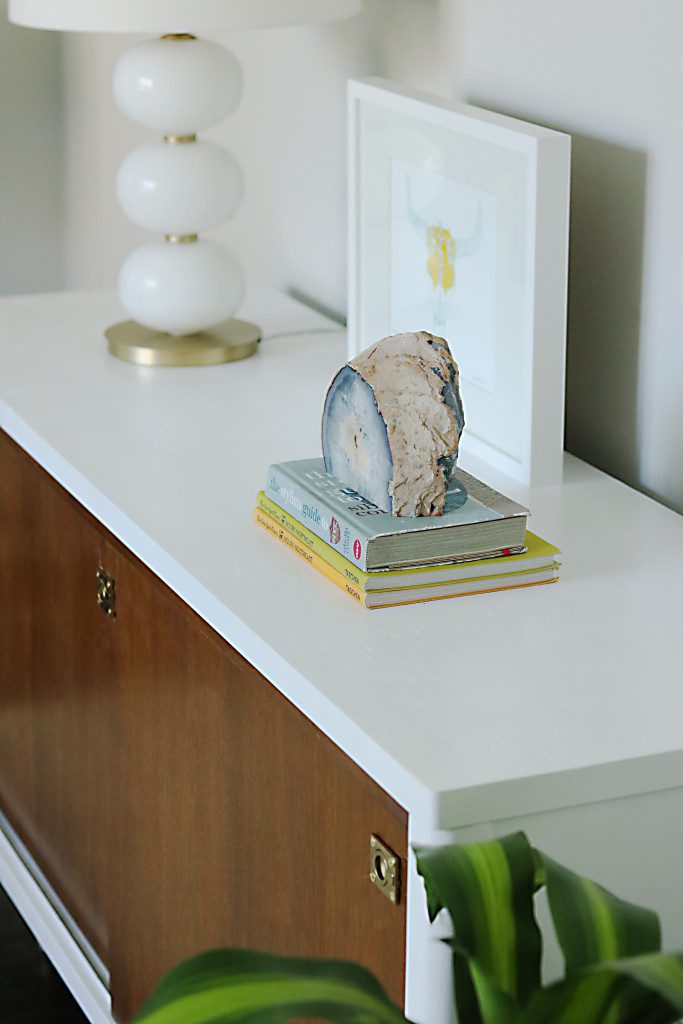
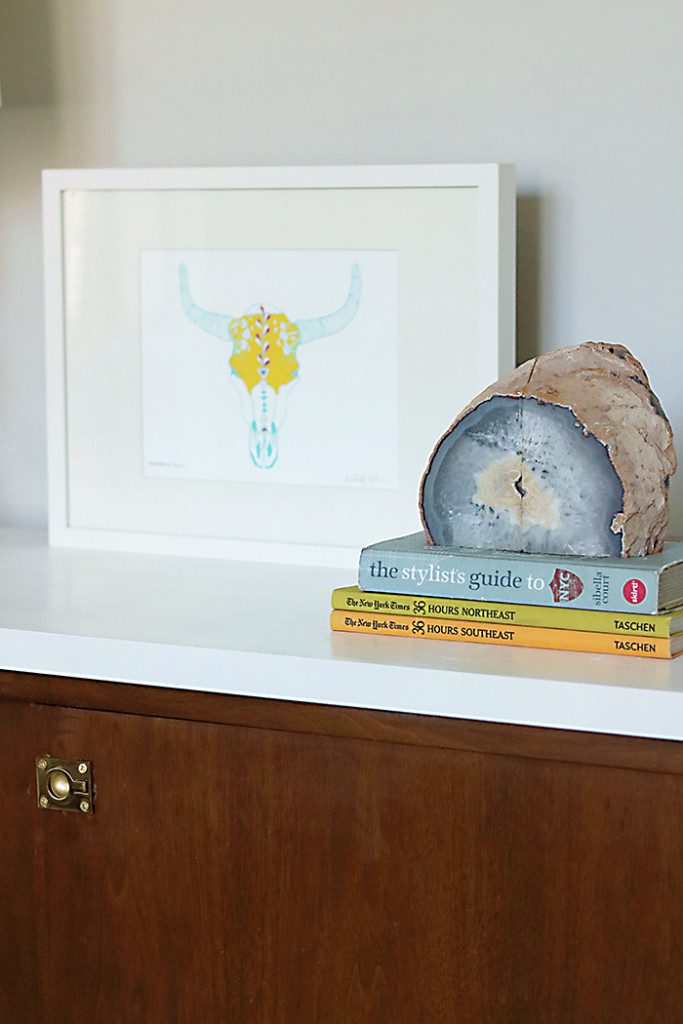
LAMP | RUG | BASKET | PRINT (similar) | BOOKS
This post was sponsored by Amy Howard at Home; however the opinions are all mine.
Want to see more Amy Howard at Home projects?


Want to get the look without doing the work?


The post Before + After: Lacquer Mid-Century Modern Credenza Makeover appeared first on Darling Darleen | A Lifestyle Design Blog.
